Montag, 21. April 2014

New accomplishments

Dear Readers,

I hope you had all wonderful easter holidays :). 

University starts tomorrow and some things still have to be prepared, so I'll do a quick post today.

I just want to show you a few picture of my two new accomplishments, which I received as easter gifts.

The first one was a washmashine set - I wanted this set all the time, because I love the retro look. 
As you see the Löffel family placed it in their bathroom.


You may have seen, that I've added a small white table in background. It's from a pizza delivery and it turned out to be a wonderful plastic table. So next time, you order a pizza... ;)


Not bad as a table, right?

The second present, I received, was the Fresian Cow Baby. 


I like her very much, but she's still a little bit shy and seems to be afraid of the nursery...

It's nice to see my Sylvanian families collections growing :).

Before I say goodbye for today, I really want to thank Emily from My Sylvanian Families Blog. She said very kind words about my site, so feel free to check out her cute blog!

See you soon,
yours Kyra


Freitag, 11. April 2014

A lustre for your dollhouse

Dear Readers,

I'm in a very creative mood these days, so I want to show you another tutorial.
I've told you a few posts earlier that I'm going to create a house for my mole family. Until now I've done the matrix, but I will soon make a post about the different processes :). Because the moles will live in a cavern-like house, they will have a round top. 
I thought it would be beautiful to have a lustre hanging there.

But before we start the tutorial, I just want to say "Thank you" to my friend Emily. She said very kind words about my blog on her site :). Feel free to check out her heart-warming Sylvanian Families Blog.

If you want to create your own lustre for your dollhouse... 

...you will need: filament (a thin one), FIMO or another sort of polymer clay, superglue and if you want gloss paint.

Step 1:

Cut 6 pieces of filament, 5 should be identical, the sixth could be longer.


Form a ball with your polymer clay.


Prick the ball onto the filament (Tipp: Put the little ball for a while in your fridge - it won't deform, if you prick it to the filament). Than add another, smaller ball.


I've added a small ring too, it looks a bit more value now ;).

Step 2: The lustres arms

Now we will form the frame for the curved shape of the arms. It should look like this:


To get similar curves, bend it over different pencils. Repeat this step for the other 4 arms.

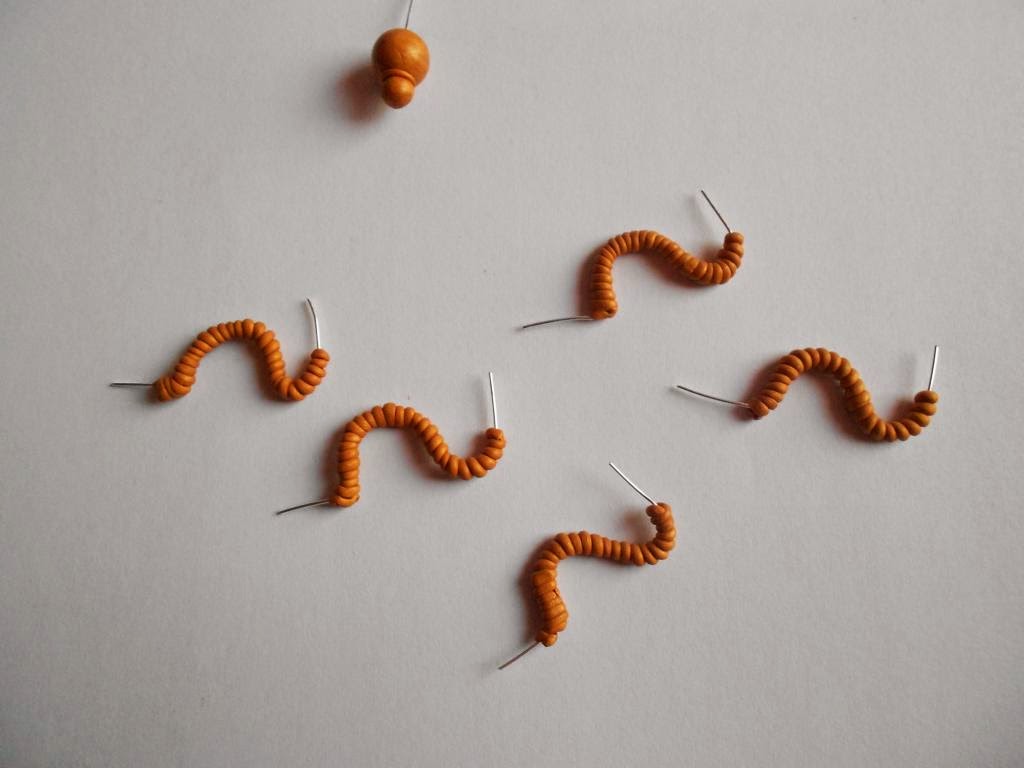
Take your clay and form a long small role.


Carefully wrap the role around the filament.


Repeat this again for the 4 other arms :). 


Cut the filament a little bit shorter. Than form 5 little balls and press them into a circle form.


Attach them to the arms.

Prick the arms carefully into the greater ball. You will have now the typical shape of a lustre, but unfortunatly it won't stay in it's form. 
Because of that, remove the arms and bake the individual parts. The little holes should be still visible after baking!

After cooling, take your superglue (please look after your fingers :)) and stick the arms to the ball, using the little holes.


We're almost ready!

Step 3: The candels

A real lustre needs candels, right? 
So again take your clay and form little cylinder shapes, like this:


Prick them on to the arms and ad little flames (also made out of clay). Put the whole building carefully into your fridge. 
Let it cool down for a while, before you remove the candels and bake them.


And we're finished :). 


(There will be a better picture as soon as the lustre is hanging in it's right place).

I hope you like it :).

Also I found this video on youtube today, it's about the new Sylvanian Families releases in Germany... If you ignore this strange song, it's quiete cute :). I like the way, the figures are moving.

Many greetings,
Kyra


Dienstag, 8. April 2014

Tutorial: Upgrading a Sylvanian Families baby bed

Dear Readers,

after sewing the little beddings, I posted earlier, I looked a long time at the beds. 
I think it's a nice idea by EPOCH, that you always get a bed for your new Sylvanian baby, but I have to admit it: They really don't look so nice! If you place them into a room, they're too low- especially when you're comparing them to other Sylvanian furniture. 
Because I adore my little Sylvanian babies (they're so cuddly^^), I made a plan about upgrading their beds. They should look more like real baby beds.

If you want an upgrading for your beds too, just follow my tutorial:

You need: FIMO or other polymer clay (of course you can also use normal clay or salt dough), fabric, yarn and a border or bobbin lace.

Step 1: The feet

Because the bed should have a higher stand, form 4 little foodholds out of the clay (they should be about 1 cm high). I've used a bead-roller to get identical pieces, but of course you can also make it by hand. 
Bake and let them cool down.


Turn the bed and stick the foodholds to the bed. Use superglue for a fast drying. (But please take care of your fingers!)


Yeah, I know, the bottom side doesn't look so nice :D.


But from the side? Better :)

Step 2: The bed canopy

You need the clay again. Form something like this:


It's a little bit lopsided, so try to correct it with a ruler, if it's lying on the baking paper ;). Bake it.

Now take your favourite fabric and cut out two rectangles (measurements: about 3,5 x 6 cm).


Turn 3 ends and fix them with a few stiches.


Fold them together with two fitting pieces of border or bobbin lace.


Fix them and apply some glue at the ends - so it shouldn't frazzle. 


It looks strange right now, but just let it dry :).

In the meantime, you can stick the "frame" (I don't know how I should call it- I'm sorry) to the bed.


Now you're almost finished: Just put the curtain on to the frame and ad some bedding. 
As you see, I made two little beds - one for my mole baby and the other for my little rabbit girl :D. 


I'm really sorry for the lighting conditions - the morning sun was blending, so I had to cover it...

I hope you had fun reading this tutorial :).

Many greetings,
Kyra


Dienstag, 1. April 2014

Forest Nursery

Dear Readers,

I'm very sorry that my time for posting is so rare at the moment. There are so many things, which have to be done for the University until the next semester.

But my fiance bought me the cute new Forest Nursery from Sylvanian Families, which made me really happy :).
Because it's so adorable, I just have to show you my new accomplishment:


From the outside - I'm sorry for the bad lighting conditions.


The inside (without furniture, instead of the swing):


I like the bottom design, especially the rail ways :).


A little tribune for theater plays.

And the inside with the furniture:):


There's something really great with the piano: You can make a blackboard out of it. 


I love this possibilty :D.

Of course my Sylvanians wanted to inspect the new building immediatly. Katie Hawthorn was also very happy that she could work again as a nursery teacher, while the children lunged at the toys:


What do you think about the Forest Nursery? 
I like it more than the Rainbow Nursery, cause it looks a bit more "real". The colours are softer and the whole room is brighter. 
Unfortunatly the Forest Nursery is smaller, but it doesn't matter (Especially, because just three kids are visiting the nursery at the moment ;)).

See you soon,
yours Kyra