I'm in a very creative mood these days, so I want to show you another tutorial.
I've told you a few posts earlier that I'm going to create a house for my mole family. Until now I've done the matrix, but I will soon make a post about the different processes :). Because the moles will live in a cavern-like house, they will have a round top.
I thought it would be beautiful to have a lustre hanging there.
But before we start the tutorial, I just want to say "Thank you" to my friend Emily. She said very kind words about my blog on her site :). Feel free to check out her heart-warming Sylvanian Families Blog.
If you want to create your own lustre for your dollhouse...
...you will need: filament (a thin one), FIMO or another sort of polymer clay, superglue and if you want gloss paint.
Step 1:
Cut 6 pieces of filament, 5 should be identical, the sixth could be longer.
Form a ball with your polymer clay.
Prick the ball onto the filament (Tipp: Put the little ball for a while in your fridge - it won't deform, if you prick it to the filament). Than add another, smaller ball.
I've added a small ring too, it looks a bit more value now ;).
Step 2: The lustres arms
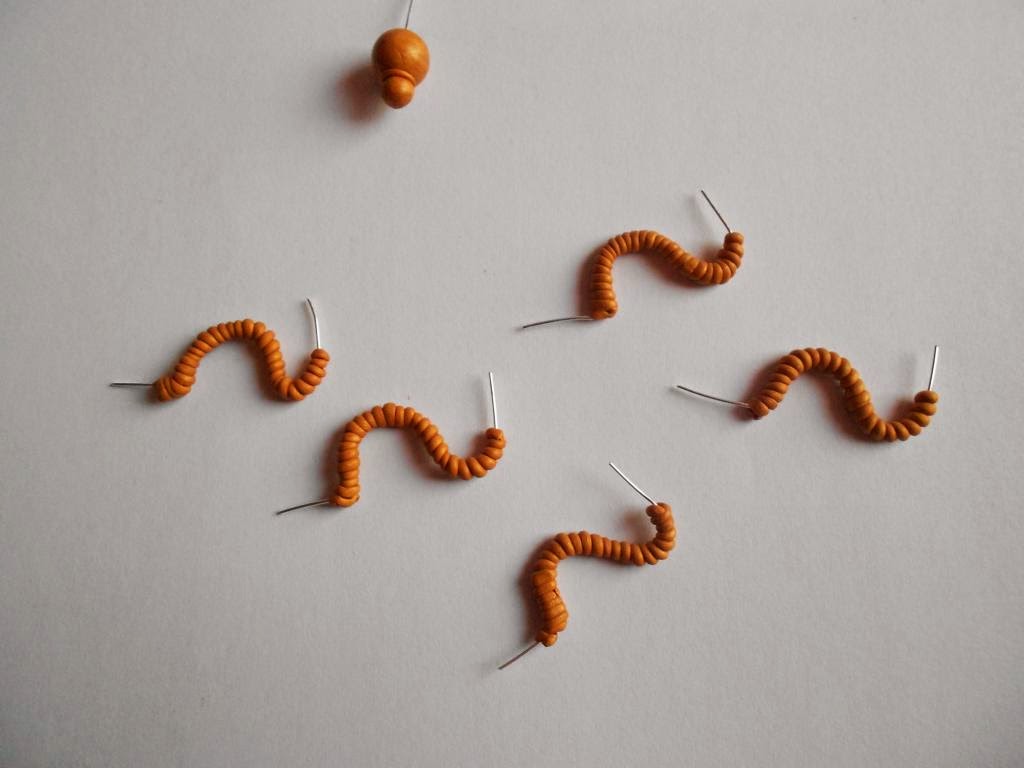
Now we will form the frame for the curved shape of the arms. It should look like this:
To get similar curves, bend it over different pencils. Repeat this step for the other 4 arms.
Take your clay and form a long small role.
Carefully wrap the role around the filament.
Repeat this again for the 4 other arms :).
Cut the filament a little bit shorter. Than form 5 little balls and press them into a circle form.
Attach them to the arms.
Prick the arms carefully into the greater ball. You will have now the typical shape of a lustre, but unfortunatly it won't stay in it's form.
Because of that, remove the arms and bake the individual parts. The little holes should be still visible after baking!
After cooling, take your superglue (please look after your fingers :)) and stick the arms to the ball, using the little holes.
We're almost ready!
Step 3: The candels
A real lustre needs candels, right?
So again take your clay and form little cylinder shapes, like this:
Prick them on to the arms and ad little flames (also made out of clay). Put the whole building carefully into your fridge.
Let it cool down for a while, before you remove the candels and bake them.
And we're finished :).
(There will be a better picture as soon as the lustre is hanging in it's right place).
I hope you like it :).
Also I found this video on youtube today, it's about the new Sylvanian Families releases in Germany... If you ignore this strange song, it's quiete cute :). I like the way, the figures are moving.
Many greetings,
Kyra


This is so smart and creative. Good Job Kyra!
AntwortenLöschenAgain you make it look so easy. How do you think this up!!! Congrats on making a great item!
AntwortenLöschenThank you very much :). Well, I don't know- it was just suddently in my mind :-D.
LöschenYou must have a wonderfully alive imagination! The video is cute..and I could understand some of the german.
AntwortenLöschenDieser Blog ist fantastisch!
Did I say it right? I don't know anymore :D
MW
Yes, you said it right! :) Thats great, did you have German at school?
LöschenActually, I lived there for a short time. It is a beautiful place: I loved the Octoberfest, and I adored skiing in the Alps. Sometimes I miss the snow... :(
AntwortenLöschenMW
Great! :) May I ask in which federal state? :) So you have no snow? I'm sorry :(.
LöschenFunnily I never went to the Octoberfest, but one day I want to go there^^
Many greetings:)